How to configure the VLAN ID for your internet connection on your TP-Link router
Some ISPs require you to configure the VLAN ID for internet connection, like Singtel, Unifi, Maxis, Viettel, MEO, Vodafone, NBN, UFB, and so on. This article will guide you to configure the VLAN ID via two methods: Quick Setup and IPTV.
Note:
1. If your internet works fine, please ignore this article and just keep the IPTV settings as the default.
2. In this article, we will take Archer AX50 as an example.
3. This article suits users who need to set a VLAN ID for internet connection.
Method 1. Configure your VLAN ID during Quick Setup
Step 1: Log in to the web interface page of TP-Link router by referring to How to log in to the web-based interface of Wi-Fi Routers (new logo).
Step 2: Click Quick Setup. After selecting your Time Zone, you’ll see the Internet Connection Type Page. Then click Additional ISP Settings to open the option.
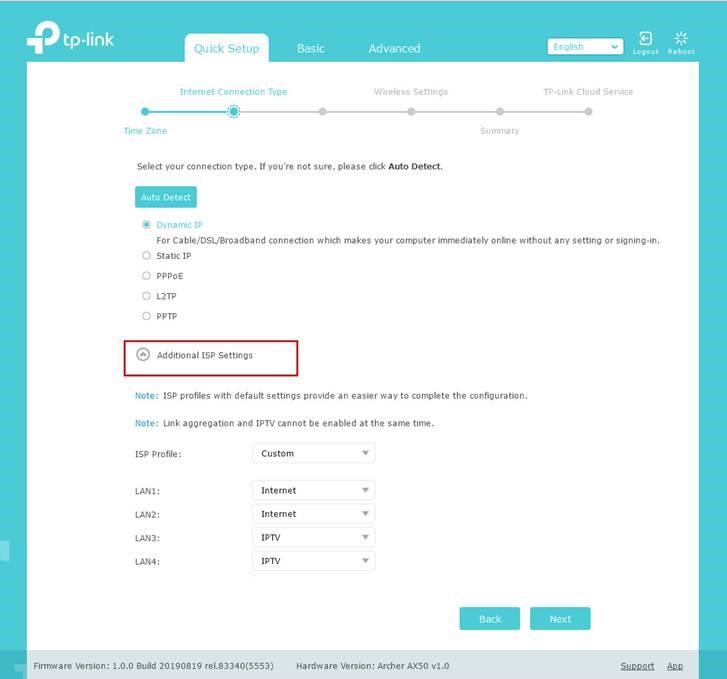
Step 3: There are many modes available in ISP Profiles.
1). If your ISP is in the list, select your ISP and click Save. We have included the correct parameters of these modes (including Singtel, Unifi, Maxis…), just select and Save.
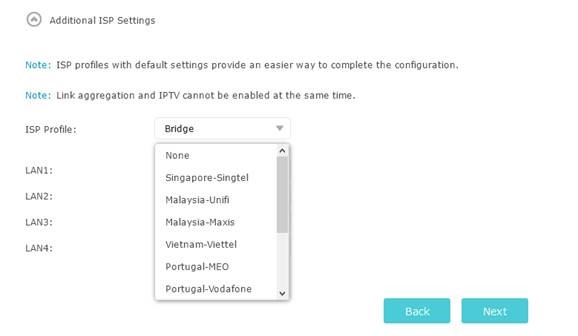
2). If your ISP is out of the list, select Custom mode and then you will be required to fill the parameters as below.
Attention: Double-check with your ISP about the information required as below if you are not sure.

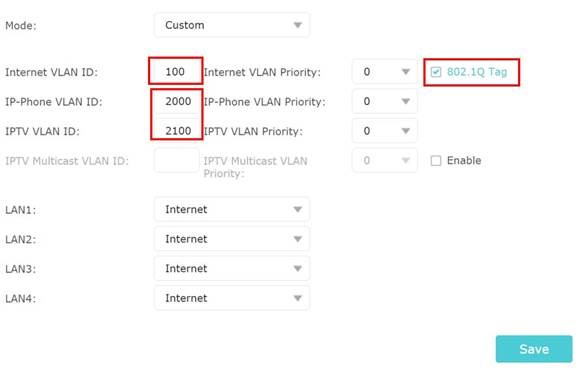
Note:
1. Type the VLAN ID provided by your ISP for the Internet VLAN ID. For example, DoDo NBN provides VLAN100 for Internet service, DoDo user should type 100 for Internet VLAN ID.
2. Check the option of 802.1Q Tag and leave the priority as the default.
3. Type two different random numbers (between 2 and 4094) for IP-Phone VLAN ID and IPTV VLAN ID.
4. Choose the Internet for all the LAN ports and click Save.
Method 2. Configure VLAN ID correctly via IPTV (function)
Step 1: Log in to the web interface page of the TP-Link router by referring to How to log in to the web-based interface of Wi-Fi Routers (new logo).
Step 2: Click Advanced > Network and you can get into The IPTV setting page easily.
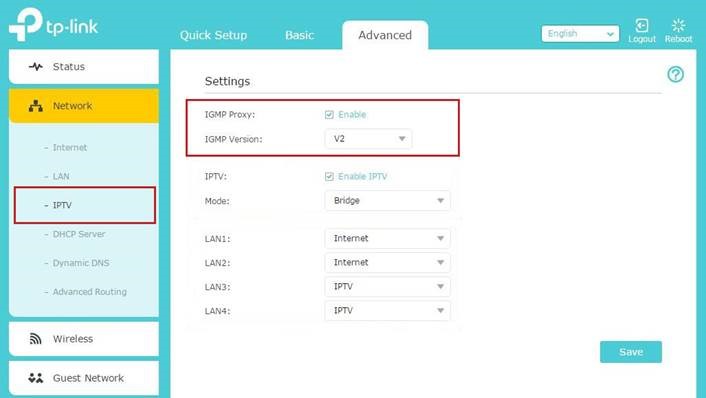
Keep the IGMP Proxy and IGMP version as default, unless your ISP told you to modify. Method 1
Note: Only some of the models have the IGMP Proxy and IGMP option.
Step 3. Fill in the IPTV parameters in the same way mentioned in Step 3 of Method 1.
Now you can enjoy your internet!